background elimination
Data augmentation to increase performance
SOLO v1(Single Stage Instance Segmentation)
Paper Implementation

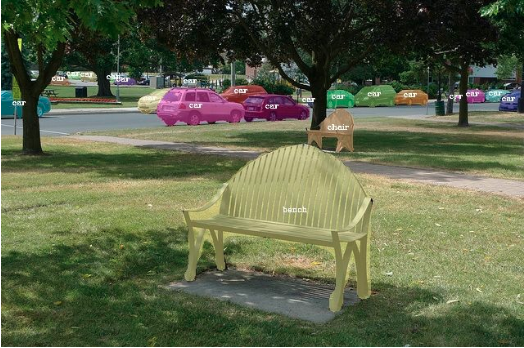
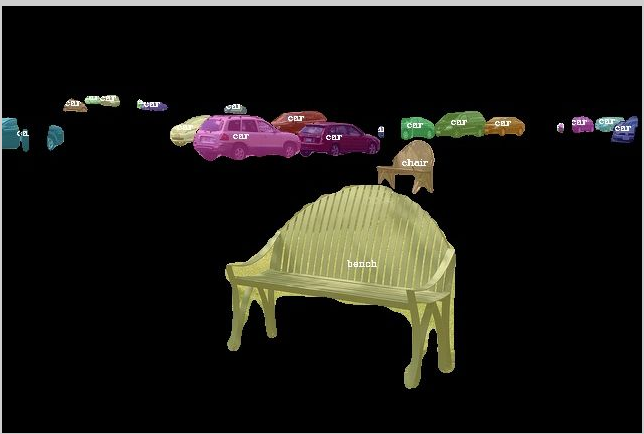
Figure 1. On the left, Original image. Middle, Image with one-shot instance segmentation. Right, image with data augmentation from my code.
-
Two stage vs Single stage
- Two stage (Doing segmentation and instance segmentation after finding the bounding box)
- Detection - Faster RCNN
- Segementation - Mask RCNN
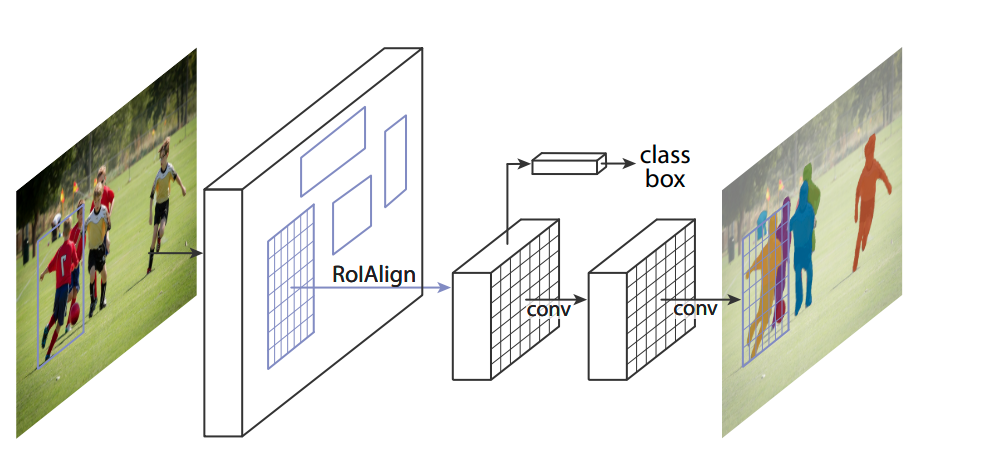
Figure 2. The Mask R-CNN framework for instance segmentation.
- One stage (Getting the instance mask right away, instead of finding the bounding box)
- Detection - YOLO
- Segmentation - SOLO
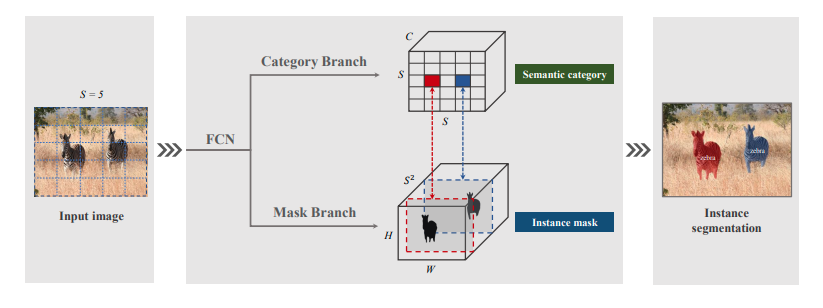
Figure 3. Solo framework
- Top-down segmentation
- It is greatly affected by the performance of the bounding box because it is first detected and then segmented.
- e.g. Mask R-CNN
- Bottom-up segmentation
- there is a pixel-embedding method to be greatly influenced by the grouping.
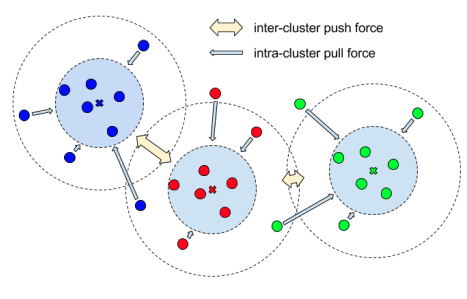
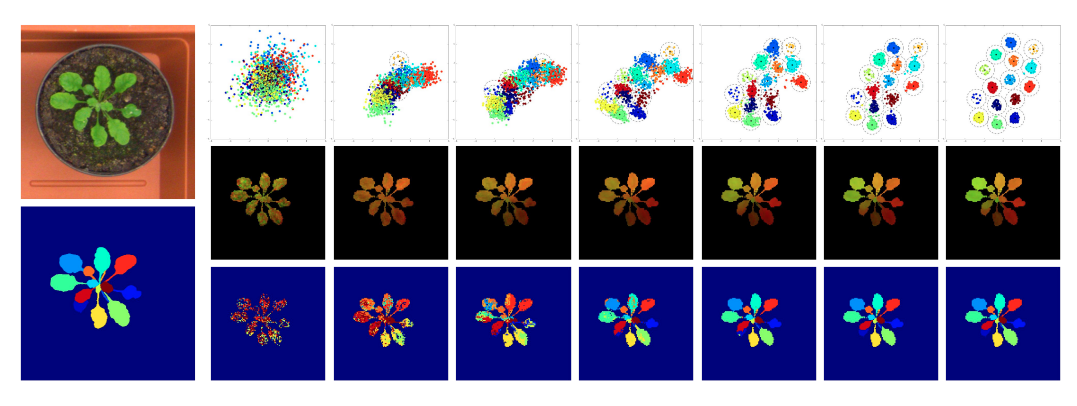
Figure 4. Bottom-up segmentation (Pixel-wise embedding)
Modifiying Solo code
def show_result_ins(img,
                    result,
                    class_names,
                    score_thr=0.3,
                    sort_by_density=False,
                    out_file=None):
    """Visualize the instance segmentation results on the image.
    Args:
        img (str or np.ndarray): Image filename or loaded image.
        result (tuple[list] or list): The instance segmentation result.
        class_names (list[str] or tuple[str]): A list of class names.
        score_thr (float): The threshold to visualize the masks.
        sort_by_density (bool): sort the masks by their density.
        out_file (str, optional): If specified, the visualization result will
            be written to the out file instead of shown in a window.
    Returns:
        np.ndarray or None: If neither `show` nor `out_file` is specified, the
            visualized image is returned, otherwise None is returned.
    """

    assert isinstance(class_names, (tuple, list))
    img = mmcv.imread(img)
    img_show = img.copy()
    h, w, _ = img.shape

    cur_result = result[0]
    seg_label = cur_result[0] #
    seg_label = seg_label.cpu().numpy().astype(np.uint8)
    cate_label = cur_result[1] #ex.(9,426,640) the number of mask is 9
    cate_label = cate_label.cpu().numpy()
    score = cur_result[2].cpu().numpy()

    vis_inds = score > score_thr
    seg_label = seg_label[vis_inds]
    num_mask = seg_label.shape[0] # the number of mask
    cate_label = cate_label[vis_inds]
    cate_score = score[vis_inds]

    if sort_by_density:
        mask_density = []
        for idx in range(num_mask):
            cur_mask = seg_label[idx, :, :]
            cur_mask = mmcv.imresize(cur_mask, (w, h))
            cur_mask = (cur_mask > 0.5).astype(np.int32)
            mask_density.append(cur_mask.sum())
        orders = np.argsort(mask_density)
        seg_label = seg_label[orders]
        cate_label = cate_label[orders]
        cate_score = cate_score[orders]

    np.random.seed(42)
    color_masks = [
        np.random.randint(0, 256, (1, 3), dtype=np.uint8)
        for _ in range(num_mask)
    ]
    for idx in range(num_mask):
        idx = -(idx+1)
        cur_mask = seg_label[idx, :, :]
        cur_mask = mmcv.imresize(cur_mask, (w, h))
        cur_mask = (cur_mask > 0.5).astype(np.uint8)

        if cur_mask.sum() == 0:
            continue
        color_mask = color_masks[idx]
        cur_mask_bool = cur_mask.astype(np.bool)

        img_show[cur_mask_bool] = img[cur_mask_bool]*0.5+ color_mask * 0.5 #instance segmentation ->  colorizing

        cur_cate = cate_label[idx]
        cur_score = cate_score[idx]
        label_text = class_names[cur_cate]
        #label_text += '|{:.02f}'.format(cur_score)
        center_y, center_x = ndimage.measurements.center_of_mass(cur_mask)
        vis_pos = (max(int(center_x) - 10, 0), int(center_y))
        cv2.putText(img_show, label_text, vis_pos,
                        cv2.FONT_HERSHEY_COMPLEX, 0.3, (255, 255, 255))  # green


    if out_file is None:
        return img
    else:
        back_ground = ~np.sum(seg_label,axis=0).astype(np.bool) #Gave the opposite value of segmentation
        img_show[back_ground] = img[back_ground]*0+ color_mask * 0 #Multiplied the background by zero to remove the background
        mmcv.imwrite(img_show, out_file)
accessed and modified inference.py of Solo code
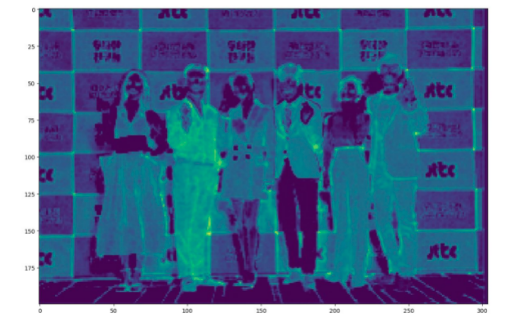
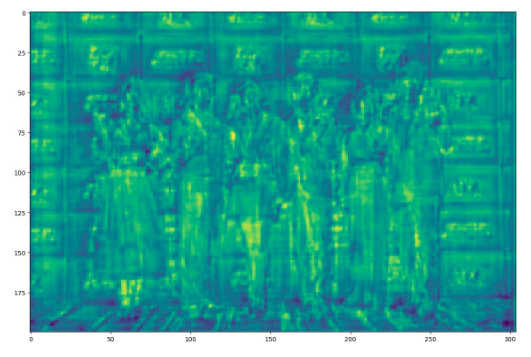
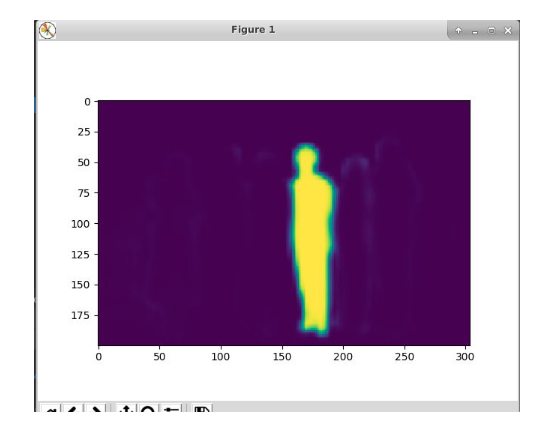
Figure 5. In the backbone network, the feature map is extracted through the resnet
-
Result


Figure 6. On the left, Original image. Middle, Image with one-shot instance segmentation. Right, image with data augmentation from my code.